

Five Basics
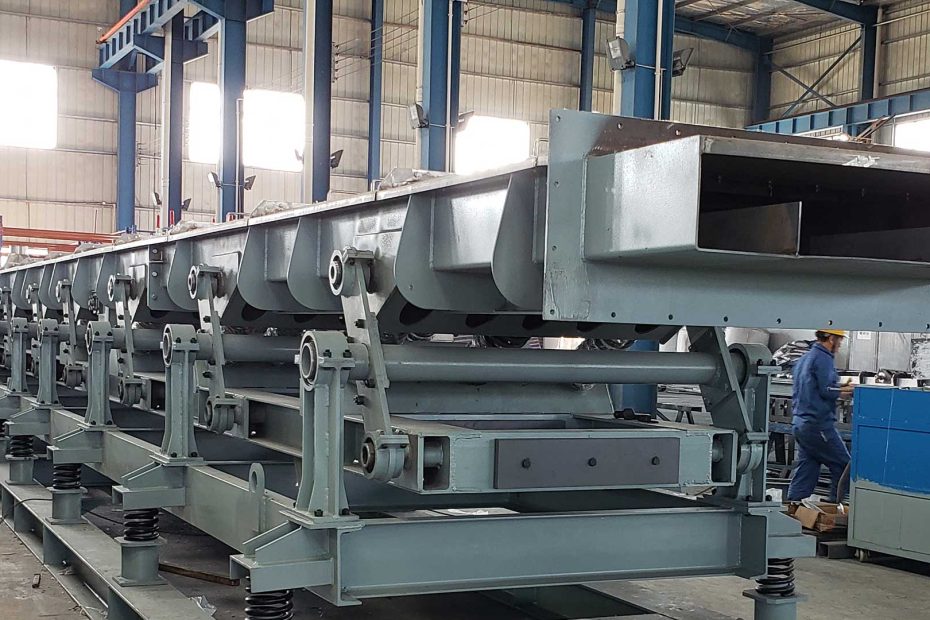
- The bottom frame and the tank of the vibrating conveyor must be installed straight. It is recommended that the straightness be no more than 5-8 mm in length at 10 meters. Excessive deflection of the bottom frame and the tank will cause greater installation stress, which in turn will cause early damage to these parts.
- In order to meet the above requirements, the lower surface of the vibration isolation spring should have nearly the same elevation, and its tolerance should not be greater than 5-8 mm.
- The installation angle of the guide rod of the vibrating conveyor should be close to the same, the shear spring should be perpendicular to the guide rod, and the tolerance of the installation angle to its nominal installation position is +-1.
- The transmission shaft is perpendicular to the center line of the tank body. The two transmission connecting rods should be parallel to each other without excessive skew. The installation angle tolerance is +-1. After the transmission shaft is installed, the rotation should be flexible, and it can be moved more than 360 degrees by hand.
- All the screws of the vibrating conveyor should be locked, usually, spring washers should be added, and double nuts can also be used to lock. Otherwise, the bolts will loosen quickly, affecting the normal operation of the machine.

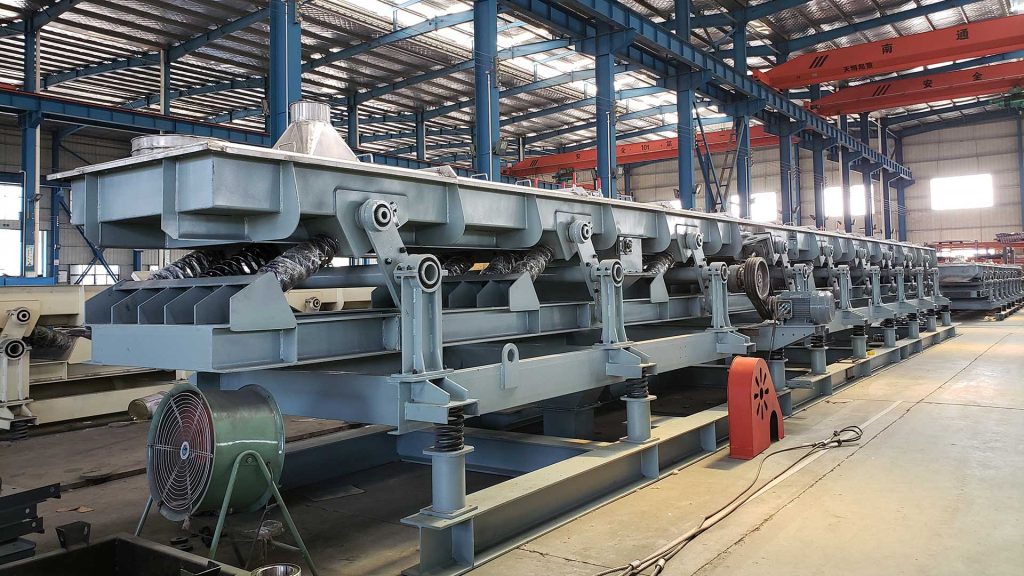
7 steps to install
- Measure the elevation of each vibration isolation spring support point, or draw a horizontal line on the nearby wall.
- Level the base frame up.
- Support the tank body on the base frame and level it.
- Install the vibration isolation spring and the spring lower seat plate under the chassis.
- Weld the guide bar and the shear rubber spring to the tank body and the bottom frame with screws.
- Install the transmission shaft assembly and motor, and weld the vibration excitation plate.
- Drop the machine, weld the feed port and discharge port, install the sealing sleeve, and fix the cover plates at both ends.
Read More: Vibrating Conveyor – Applications, 4 Types
Four major inspections of long-distance vibrating conveyors
The types and contents of long-distance vibrating conveyor maintenance; should be divided into weekly inspection, monthly inspection, semi-annual inspection, and annual inspections, etc. The details are as follows:
- Weekly inspection: Check whether the compression nut of the connecting rod spring is loose, whether the compression amount is appropriate, whether the belt is tense, whether the counterweight is fastened, whether the sealing sleeve is broken, or whether there is dust leakage, etc. every week.
- Monthly inspection: Check whether the V-belt is damaged and cut the spring. Check whether the vibration isolation spring is broken, whether there are cracks in the weld, and whether there is enough lubricating oil for the drive shaft.
- Semi-annual inspection: carefully check the welds of each part, open the transmission shaft and bearing cover, check the working condition and wear of the bearing, and check whether the rubber spring is aging or cracked.
- Annual inspection: Overhaul the transmission part once a year, replace the damaged spring, check the wear of the tank body and the feed port, and carry out partial replacement or overhaul if necessary.